Showing posts with label before and after. Show all posts

Friday, July 22, 2011

Before and After Photo Fun

So my love affair with my camera came to an abrupt halt a couple of weeks ago when one of the knobs started sticking. We sadly parted ways for awhile. I should be getting the camera back as soon as repairs are finished and the store says that I can come to pick him up. But in the meantime, what to do? I am working on a Project Life album and I am trying to take a picture a day. Without my camera I thought it would be difficult. I would again have to rely on my cell phone to capture my treasured memories...

I have to admit, I didn't like this idea at all. My phone takes pretty decent pics for a phone but problems with lighting and shutter speed aren't easily resolved with the phone. It's pretty much a one trick pony and often I'm left with an underexposed/overexposed, shadowy,and/or blurry image. BUT I have to make do...so enter Picnik! I <3 this application so much! Thanks to my friend, Janene for introducing us! I use the free version and although I am tempted to upgrade, I find with some tweaking I can get some really satisfying results with the free version!

I thought it would be fun to show some before and after pics! Now, I am by NO means great at it! I just know what I find aesthetically pleasing and I try my best to see it in my mind's eye and then make it happen. I really know very little about composing a shot and I am just wrapping my head around fstops, aperture and all the other stuff that real photographers know a lot about.

Who knows if you will even find the pictures greatly improved after my editing in Picnik! I guess I just want to show the big differences between the before and afters so you can see for yourself that you can make a not so wonderful picture (even one taken with the camera on your phone) into something more interesting to look at...

Here's the first one:


This is a cute picture as is, in my humble opinion.  That smile is perfect! It's a little dark though.

Here's the after: I wanted to brighten it up a bit and give it a "glowy" look. I cropped it a bit and put the focus on Chloe's face. I also drained some of the color because I wanted the focus of the picture to really be her expression and didn't want any distraction from that.


And here we are side by side.

HA! This is fun! Here's the next one:
Here we have the morning sun blaring in from the window in the background, tragically overexposing the one corner of the pic and casting the baby into darkness. And look...she is so happy and giving that fake baby a kiss. It's so adorable and you can't really make it out so well.

Here's the after! I like it so much better.  Now the sun looks "glorious" and you can see Chloe just loving her baby so much. I messed around with the exposure to lighten up the baby and then used the "cross process" effect to give the pic some more definition.

Here they are side by side:
Better, right?

Okay, NEXT!
Here she is looking pretty.

Here's the slightly funky after. I wanted her to look like a china doll in this pic. So I went black and white and then let the pic fade through a little. Then I used focal B&W and focused on her cheek to give her a little color on face and lips.

Here they are side by side:

She does look like a baby doll in the after shot, doesn't she?

All right, here is the last one:
Aren't they cute? I love it when everyone is in a good mood in the morning!

Here's the after. I cropped it a bit, then I used the "Holga-ish" effect in Picnik which focused us on the girls a little better. Then I cross processed and added a 60's effect on top of that (minus the rounded corners).

And so you may compare:

So much fun...for me anyway (I'm a huge fan of the "before and after" in all it's forms!) Sorry if I bored everyone else!! :)


Friday, February 25, 2011

Before and Afters, Before Afternoon


This week, I decided to take note of the small stuff. As a stay at home mommy (who is on the run a lot!) I often get overwhelmed with my day to day tasks. Sometimes at the end of the night after I've been "working" all day I look around and wonder what I actually accomplished.  I don't have to explain how quickly order turns to chaos when there are four little girls, a goofy dog, and busy mom and super dad in the house.

Yesterday, in an effort to feel better about my everyday tasks, I decided to take some quick before and after shots. None of these tasks took a lot of time (minutes) and what a difference they made!  These are the little (big) messes and chores that I do E-V-E-R-Y day. Seeing the before and afters makes me smile and reminds me of the good job that I do. Even when it doesn't seem like I have accomplished much, I know that if I do these small things every day there is a BIG difference in my home and that makes me happy! As much as I wish my spaces could look like my after pictures all of the time, all I will need to do is take a quick peek at my before and after pics this week to know that what I do here matters and hopefully it will give me motivation to do it all again. And again. And again. And again!


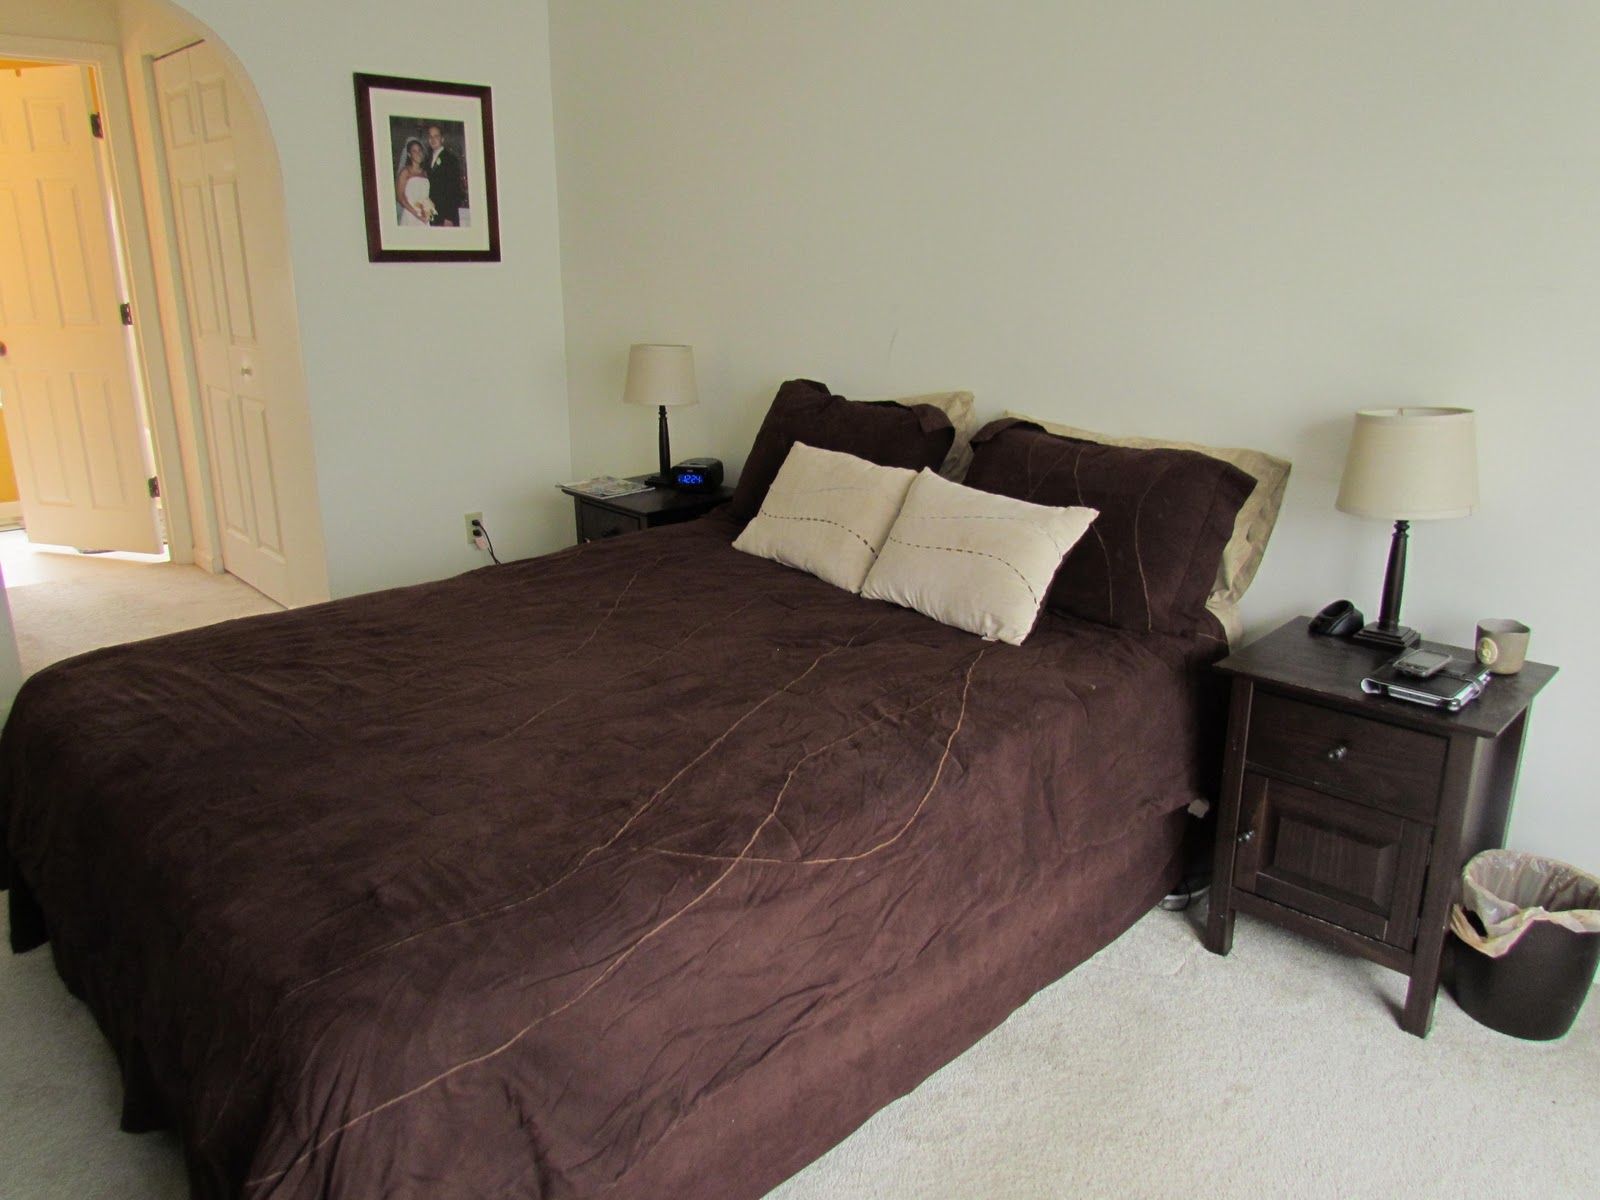
Our Unmade Bed

The Bed is Made (2 minutes or less)

Clean dishes need put away.
Dirty Dishes need loaded or hand washed.

Clean and Shiny Kitchen Sink!
(25 minutes--including hand washing pans and bottles!)

Our Dumping Ground--
mail, bags and purses, miscellaneous papers
 and dishes and food and toys!

All Clear! Even turned on the digital frame!
 (10 minutes to put everything in its home)

There's an empty spot in her tummy!


Lunch hit THAT spot! And what a pretty "after picture."
 My favorite task of the day: Putting a smile on that little face!

Head on over to I'm An Organizing Junkie to see more wonderful before and after pictures to motivate you today!

Friday, January 28, 2011

The Pantry Plan: Pantry Organization


Check out some other great organizing stories at orgjunkie.com


Welcome Organizing Junkies! This week I decided to try to tackle my pantry. We only moved in 3 months ago, so at first I didn't think this was an area that needed much work.  I had put everything away in (what I thought was) an organized fashion. But three months later I noticed that things were toppling, some shelves were underutilized, and the layout of the items stored wasn't making sense for our lives.  Instead of looking organized, clutter was creeping in.  So, I made a promise to re-evaluate the space every quarter to keep it looking its best. I still have big plans in here as far as storage goes. And I would like to have a cheery pantry like some that I have seen in the blogging world with some decorative pizazz! So I plan to keep my eye out for some economical but stylish storage solutions and I plan to do some painting in here to take things for stark white to clean, bright, and out of site!

Here's where we were before:

As you can see, there really is no rhyme or reason for what goes where, hence a shelf of alcohol, baby food and candles.   It goes to show you that some planning and forethought needs to go into an organized pantry.  My previous goal was just to get everything unpacked and put away! Now I need to put it in a spot that makes sense.

And so, I took things out shelf by shelf and decided what would work better. I knew I wanted to move the snack foods onto a higher shelf so that I could eliminate the sneaky snacking that one (or more) of my girlies would do.  They would hide away in the pantry and have easy access to cookies and chips placed on a low shelf right at their eye level. Very smart mommy they have. Another thing I knew I wanted to do was reduce the eye clutter of all the plastic bags that hold diapers and wipes and paper products.  If I had a bigger budget (ahem, A budget) for the project then I would invest in containers to store all of my dry goods so I could get everything looking more uniform. So now that I know what I want, I can save up for it, or keep an eye out for deals on containers that will work!

Here's what we ended up with:

I took out the large metal garbage can and  replaced it with a small plastic one that was in the laundry room. I cleared the baby food from the boxes on the bottom shelf and relocated it to a place it will be used. And I tried to put like items on the same shelf.


I moved the alcohol to a higher shelf. I moved the easy bake ovens upstairs (technically it's a toy, right?). I moved the snacks to a higher shelf. I dedicated a shelf to the baby's food, and I put cereal and bread on the same shelf--my potato bin is there too. That bottom shelf that you can't see has my crock pot, other kitchen tools,  and there's a little section for the dog with his treats and a bin for his food.

These are my favorite parts of the project:

 When I emptied the baby food, I used the empty boxes to store diapers, pull ups and wipes. I just covered the boxes with paper and took the diapers out of their package and put them into their new home. I also removed the plastic from the cups and plates. Doing those two little things makes this shelf look much tidier!

I tried to stack the baby food neatly but after I was 75% finished I experienced a cascading avalanche of little jars. Ouch, my toes! Besides realizing that we have way too many jars of baby food I learned that stacking them was not a good idea/ So I found these pink bins that are actually wash basins from the hospital (when Ava was in) and used them to corral the baby food. I also moved the snack "up high" so now the girls are forced to ask for something instead of just helping themselves to a secret binge fest!

There's still some work to be done here but I am happy with the finished result and I'm more motivated to put things in their place!  That's the point of organizing!  Thanks for visiting!

Thursday, January 20, 2011

Hampered by Hampers no More!


Check out some other great organizing stories at orgjunkie.com


I used to have a basement laundry room. Yes, it was cold down there and I had to fend off the occasional centipede or other basement bug, but I was able to sprawl out. My laundry mountain was less of a mountain and more like rolling hills of laundry. I had piles here and piles there and plenty of room to maneuver.  When we moved I traded my basement laundry for a first floor laundry room right off of my kitchen. I can see the usefulness of a first floor laundry. The convenience of having the laundry room nearer to our living space allows me to get things done and still keep an eye or ear on what the girls are up to. The convenience is nice. But the conundrum that quickly presented itself could not be ignored--what do I do about my rolling hills of laundry?

It is no longer feasible to store dirty laundry in the laundry room. First of all, in a family of six, where five of the six are females, I'm sure you can imagine that the laundry situation can quickly get out of control. Between potty accidents, and multiple outfit changes (some necessary and some unnecessary) there is no where in the new laundry room to "stage" the laundry process. Secondly, I certainly don't need my guests viewing my dirty laundry--literally.

What to do?  First I thought about placing a dirty clothes hamper in each of the bedrooms, but the idea of digging through four hampers to gather up a like-colored load of laundry seemed like too much work for me. Then I began eyeing up a closet in the master bedroom to use as the dirty laundry station.  Thankfully, there is plenty of closet space in the master. This closet is in the main part of the room, so it is easily accessible and I couldn't think of what we would need it for since there is already a his and a hers closet right outside of the master bathroom. So, I began to pile up the laundry in there.


There are a couple of problems with this set up. Because baskets must be stacked on one another it is difficult to expect the little ones to sort clothes into the proper baskets. It was even proving difficult for my husband. And it was really irking me to find one of his gray work t-shirts in with the whites or a pair of jeans in with the towels.  Plus, this picture doesn't really illustrate the depth of the disaster when the laundry would begin to take over. If I skipped a day of laundry and or the girls each had more than their usual outfit changes (like the days when they play "dress-up" with their "real" clothes instead of "dress-up" clothes and I have no idea what has been worn for the majority of a day versus what has been worn for ten minutes) the laundry would begin to spill out of the hampers and into my bedroom and the closet door wouldn't close. I would begin to feel claustrophobic, sloppy, and irritable.

So I got the bright idea to change out my laundry baskets so that everything was of similar size and would fit into the closet space.  I added (actually Jim added at my request) an additional linen shelf and I created a map of sorts so that the family could help me sort the laundry when they came to toss it in the closet. Here's what we ended up with:


I'm excited about this project! The baskets are the perfect "load" size. So when I see that one is full I can easily carry it down to the laundry room and wash it.  We used up some of the dead space in the closet by putting the baskets on the shelf.  Also, now everyone can see what goes where and put it there (hopefully?).  There's enough room in the closet that we could add another shelf if we need the space for laundry related supplies or linens or anything else.

I plan to keep up my habit of doing one load of laundry per day from start to finish so that the closet doesn't become overrun. Here's the side by side:


I feel less stressed about my laundry situation.  Dare I say, I'm looking forward to doing laundry?

LinkWithin

Related Posts with Thumbnails